
More than 54,000 plugins are yours if you own a WordPress-powered website! This means you can download and install them all you want.
You can optimise your site for optimum performance. From the most popular WordPress plugins, such as Yoast and Jetpack and everything else in between, just take your pick.
Unfortunately, though, there’s a thing called a low upload limit.
When uploading files beyond the max file size in WordPress, it will produce an error message and deny you from uploading that file.
This problem prevents you from uploading and activating not only your desired WordPress plugin but also your preferred themes and even important images and videos on your site!
If you’re wondering how to upload files without worrying about the max upload size limit, wonder no more. Of course, you can!
In this post, we’ll walk through the steps to increase the maximum file upload size in WordPress. This way, you won’t experience any limits when uploading large files you need and want.
Step 1 – Check your max upload limit in WordPress
Adding images to your post increases its value. Facebook posts with their share of images, for one, see 2.3x engagement!
The problem with this, though, is you can go overboard. You can upload all sorts of images, and WordPress doesn’t allow it.
Luckily, there’s a workaround.
Every time you upload images or media, WordPress automatically shows you the maximum upload limit, right? Well, you can use this info to either decrease the file sizes you’re about to upload or increase them!
To show you how to find the default upload size, just go to your WordPress site’s dashboard. On the sidebar, open Media and choose to Add New.
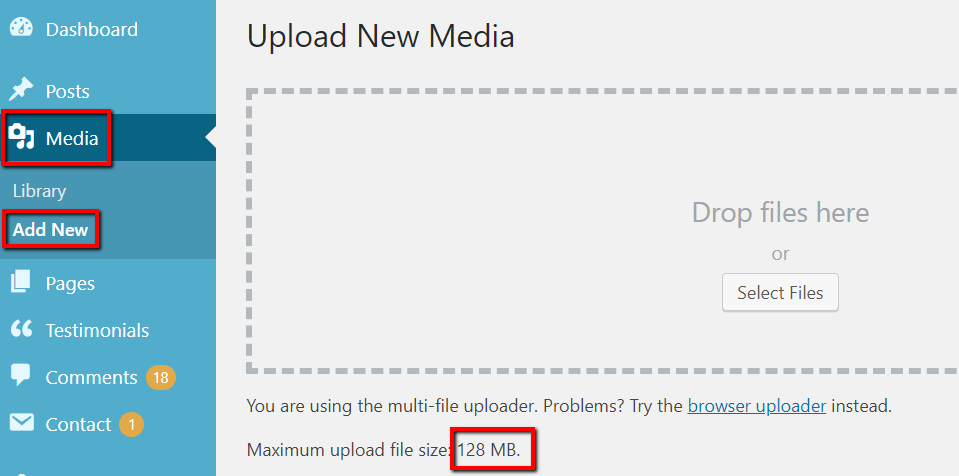
A new page will then load. Along with allowing you to upload new files, you can find the Maximum upload file size.
If you’re fine with this file size limit, leave it as it is. But if you sometimes get an internal server error when uploading images, this could be the problem.
You could be uploading images too big for your site to handle. Therefore, you should make some changes.
Step 2 – Choose a method
There are different ways to increase the max file upload size limit on your WordPress site. Each one is simple since all you need to do is access certain folders and open an editor to paste a few lines of code!
Remember: it’s important to be careful when making changes using each method. Avoid doing a rushed job since you can drastically impact your site and cause it to crash.
Edit the functions.php file
Since you want to change the file upload limit, tweaking the functions.php file will do the trick. This file’s purpose is to put in custom functionality to your chosen theme and to your site as well.
So here’s how you go about it:
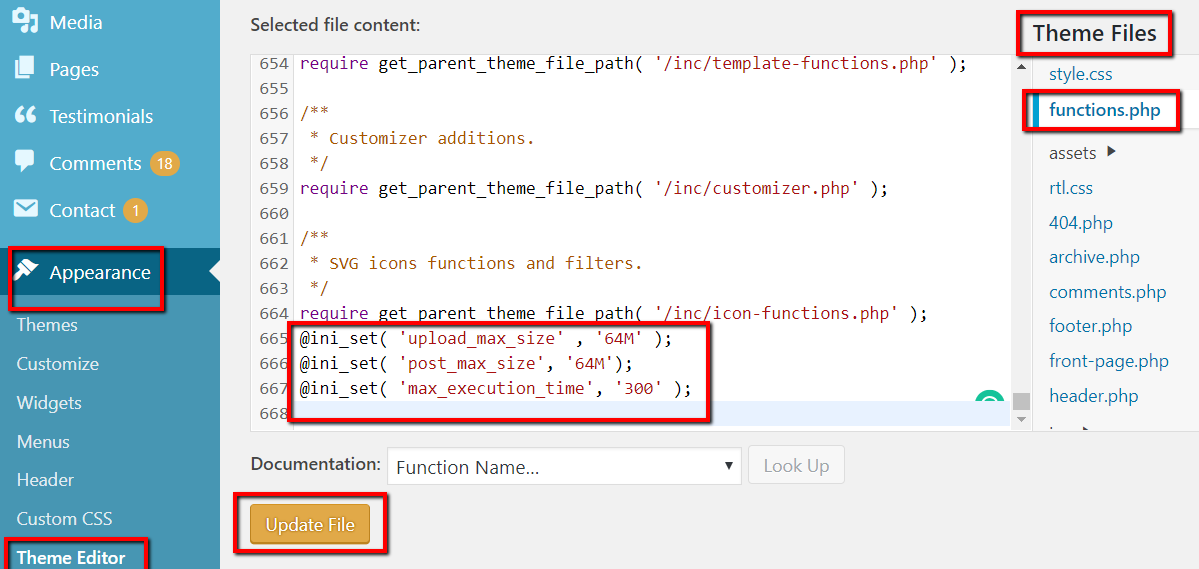
On your WordPress dashboard, select Appearance. Then load Theme Editor.
Under Theme Files, select functions.php. When the PHP file loads, paste the following code:
@ini_set( 'upload_max_size' , '64M' );
@ini_set( 'post_max_size', '64M');
@ini_set( 'max_execution_time', '300' );
And click Update File.
Modify the .htaccess file
Using the .htaccess method is also simple. After all, the job of the .htaccess file is to override your WordPress installation’s general settings.
There are two ways you can access the .htaccess file to modify it.
The first is by logging into your web hosting dashboard. The process here depends on the platform you’re using.
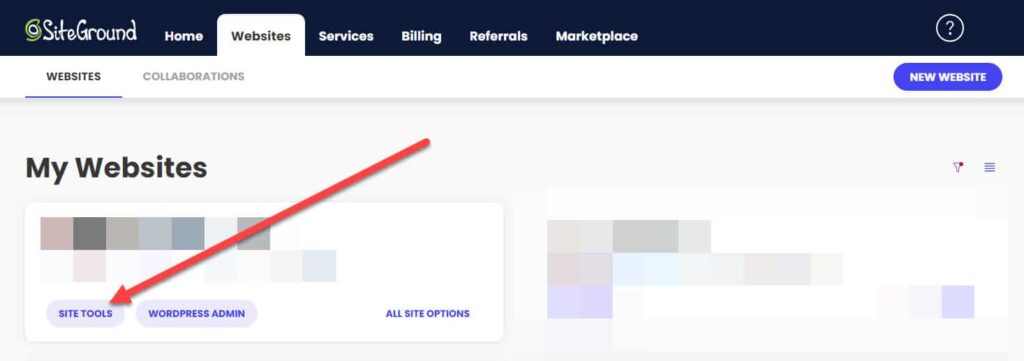
For Siteground users, you can do this by clicking on the Websites tab and clicking on the Site Tools of the WordPress website you want to increase its max upload file size.
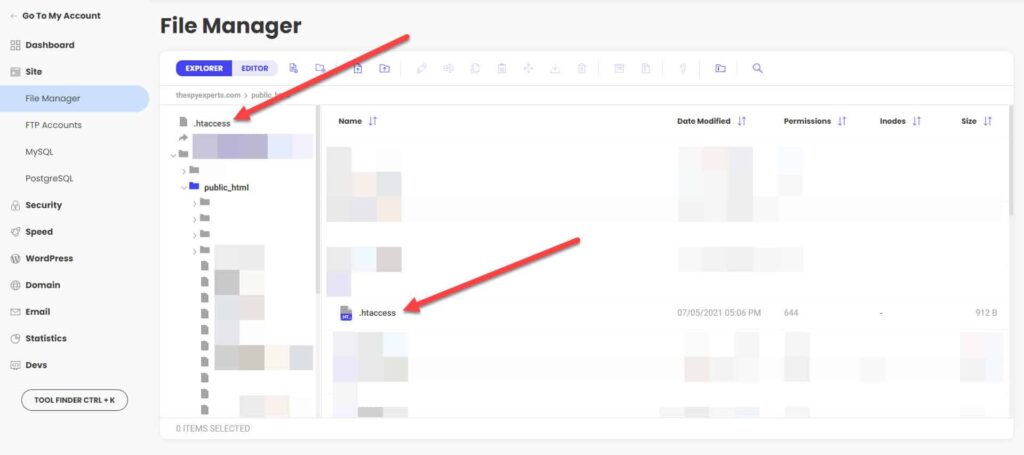
Next, click on Site > File Manager on the left sidebar. Then click on the public_html folder to see the .htaccess file from the directory. Or you can directly access it from the director’s side panel.
The second way is by using an FTP client. FTP clients let you transfer files to and from a web server and a computer.
You must first create an FTP account from your web host. Using Siteground again, go to Site > FTP Accounts and create a new one if you haven’t yet.

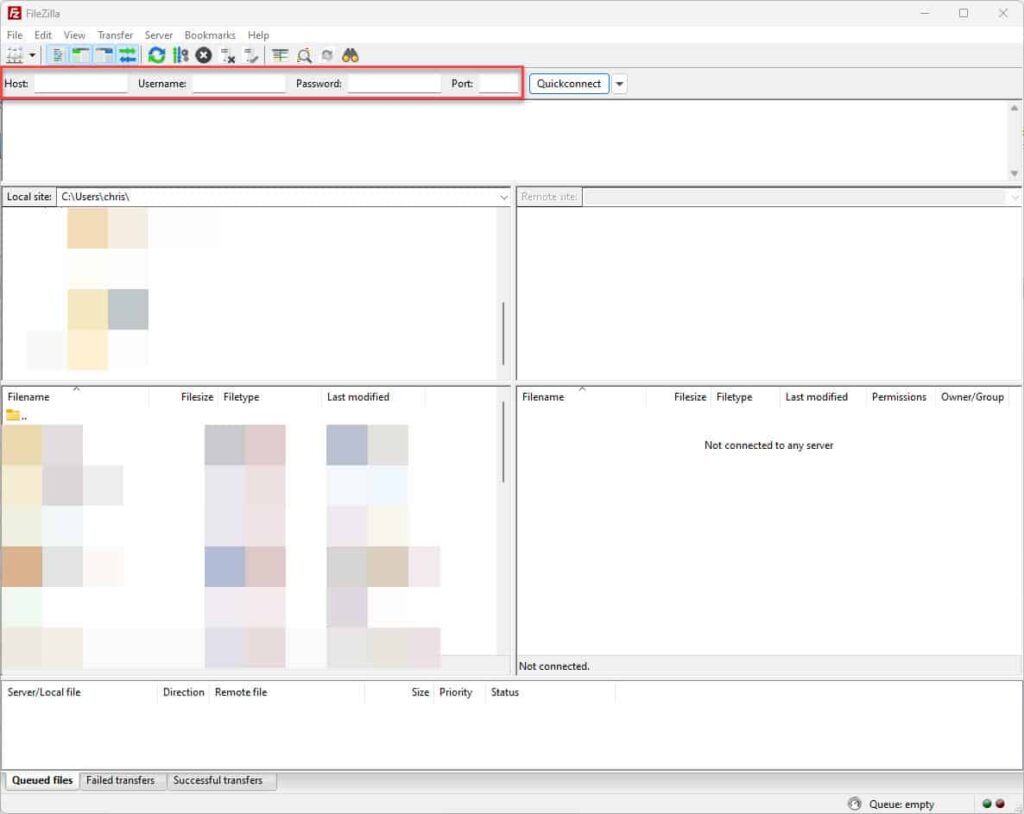
Next, download an FTP client like FileZilla and input the login information there.
Once you have access, go to the WordPress root directory of your site. Using an editor, open the .htaccess file and into it, paste the following code:
php_value upload_max_filesize 64M
php_value post_max_size 64M
php_value max_execution_time 300
php_value max_input_time 300
Modify the PHP.INI file
The INI file serves as the configuration file (default) for running any application that requires PHP. You can use it to control different variables, such as the WordPress upload size.
You can edit it once you can access the file. To do that, you will also need an FTP client.
Go to your site’s root folder. Then open the php.ini file using an editor, and into it, paste the following code:
upload_max_filesize = 64M
post_max_size = 64M
max_execution_time = 300
If the INI file doesn’t exist in your site’s root directory, it will use the default PHP settings on your server. In this case, you must create a new INI file containing the information above.
Final thoughts
Increasing the maximum upload size limit for your WordPress site using the methods above is simple. You can pull it off in a matter of minutes!
The catch? They might not work especially if you’re on a shared hosting plan.
On the bright side, there’s a solution. Just contact your web hosting provider.
Fill them in on the situation and ask for help. Hopefully, they can fix the issue for you in no time!
If your main goal is to generate more sales for your business, increasing the max upload file size upload limit is a surefire way to help you out. That, and tweaking other parts of your website to make it more functional.
100 Tips for Maintaining Your WordPress Site
Defend your site from hackers, improve speed, and learn tactics used by WordPress experts
Thank you for subscribing.
Something went wrong.