


Adding a user to your Google Analytics account can be super beneficial, especially if you’re collaborating with a marketing agency or need to share access with team members. But how can you do this, practically speaking?
If you’re confused about the process, you’re in luck. We’ve put together a comprehensive, up-to-date guide to help you add a user to Google Analytics 4 with ease.
Why Add a User to Google Analytics?
Before diving into the steps, it’s important to understand why you might want to add a user to your Google Analytics account. When you grant access to collaborators, you allow them to:
- Analyse website performance: Marketing partners can better understand your traffic, SEO, user behaviour, and eCommerce conversions. This means they can optimise your campaigns and analyse cost metrics without you having to micromanage them.
- Ensure data accuracy: With direct access, partners can view real-time data and make informed decisions without needing to wait for reports.
- Maintain security: Rather than sharing your login details, you can assign specific permissions and keep appropriate account level access available to them. This type of user management helps to keep your account secure as well.
10 Key Steps to Add a User to Google Analytics
Now’s the time for the tutorial portion of this article. Follow these simple step-by-step instructions to add a user to your Google Analytics account:
Step 1. Log In to Your Google Analytics Account
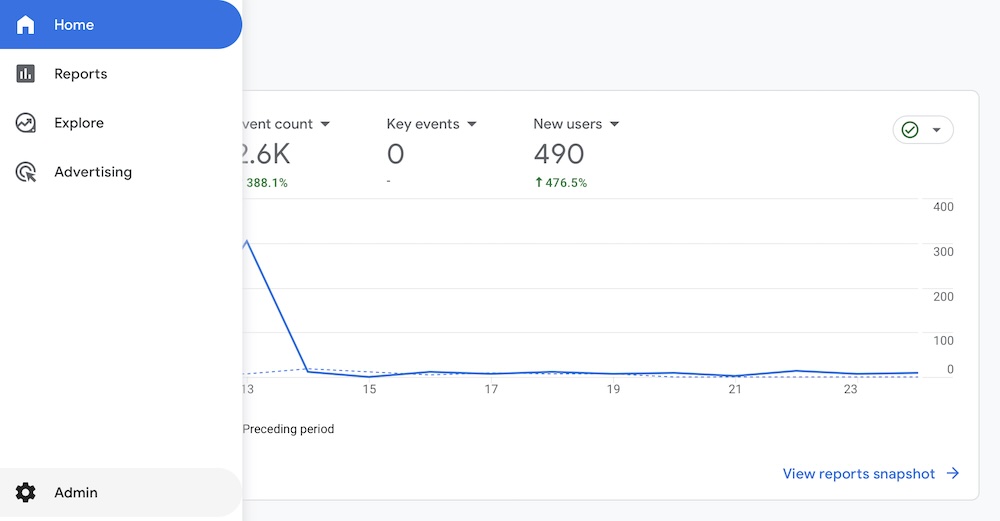
Start by logging into your Google Analytics account. If you don’t have an account yet, you’ll need to create one first. Once logged in, you’ll see your Analytics dashboard.
Step 2. Access the Admin Section
In the bottom left corner of your dashboard, click on the Admin button. This will take you to the admin interface, where you can manage settings for your account, properties, and views. Remember, we’re not working with Universal Analytics anymore — GA4 is what you need to work with. Google offers a thorough guide for setting up GA4 if you need to complete those steps first.

Step 3. Choose the Correct Account and Property
Ensure you’re working within the correct account and property level. You’ll see these options at the top of the Admin panel. Select the account and property to which you want to add a user.

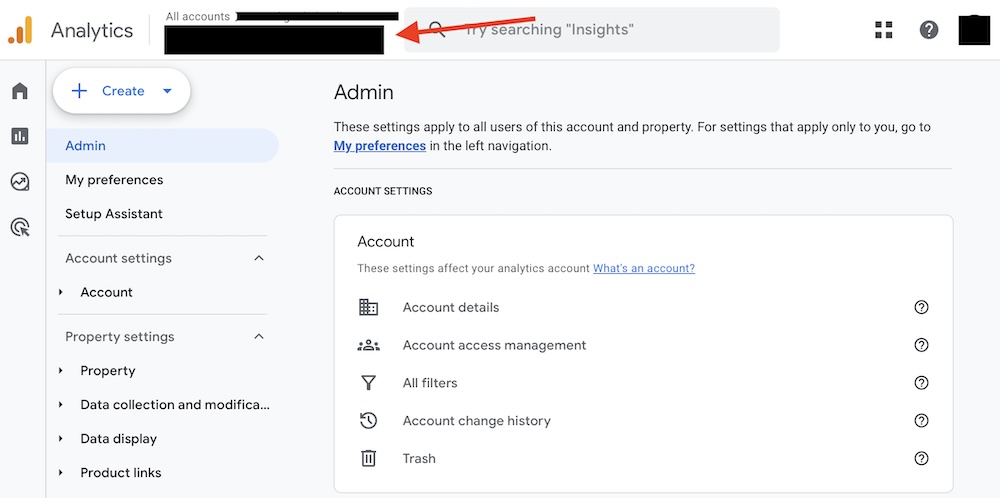
Step 4. Navigate to Account Access Management
Under the selected account, find the Account Access Management option. This section allows you to manage user access for the entire account. If you prefer to add a user to a specific property or view, select Property Access Management or View Access Management.


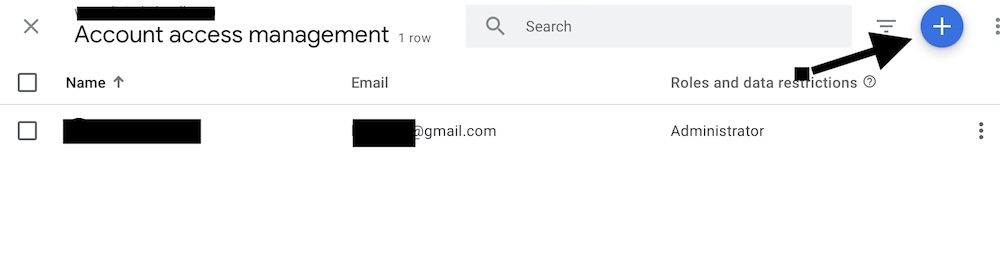
Step 5. Add a New User
In the Account Access Management section, click on the blue plus sign (+) in the upper right corner, then select Add Users. Here, you’ll add the new analytics user you’d like to have access to your account. As a word of caution, it’s recommended to only provide administrator role access to those you know you can implicitly trust. That is, only provide the level of access that’s required for people to do their job — no more, no less.

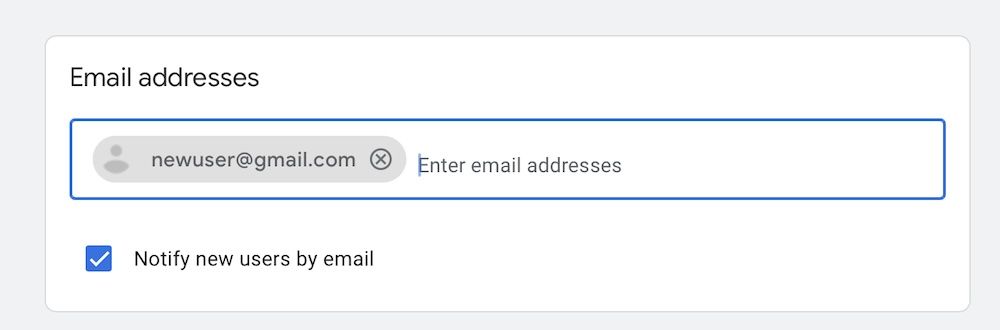
Step 6. Enter the User’s Email
Enter the email address of the person you want to add. Make sure the email is associated with a Google account at gmail.com. You can add multiple emails if necessary.

Step 7. Set Permissions
You’ll see several user permission options:

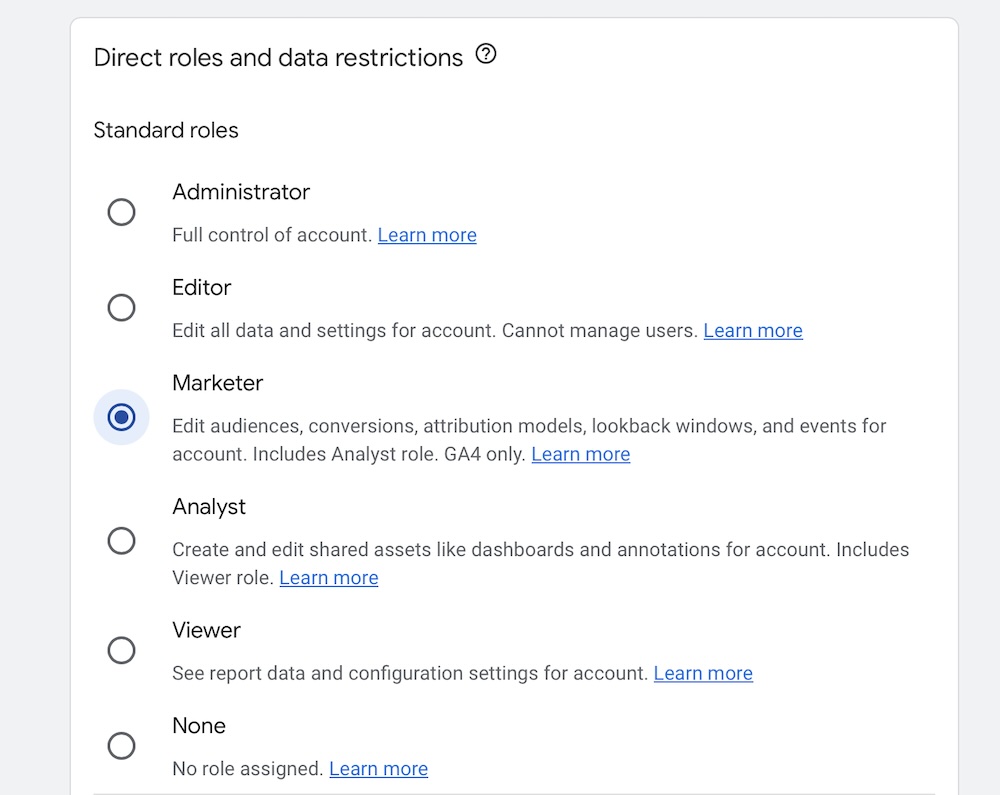
- Viewer: Can view reports and configuration settings.
- Analyst: Can create and share assets like dashboards but cannot make administrative changes.
- Marketer: Can edit audiences, conversions, and events and includes Analyst access as well.
- Editor: Can edit configuration settings and manage users.
- Administrator: Has full control over the account, including managing users and editing settings.
Select the appropriate permissions based on the user’s role. It’s generally a good idea to provide the least amount of access necessary to perform their tasks for your online business.
Step 8. Set Data Restrictions
Beneath the user role section, you can also set data restrictions. Specifically, you can toggle on or off cost-related metrics and revenue-related metrics. If you don’t want those working in Analytics to have access to your revenue or spend, disable these.


Step 9. Notify the User
Tick the checkbox for Notify new users by email to ensure they receive email notifications about their new account access. This step is crucial as it guides the new user through accepting the invitation and accessing the account.
Step 10. Save and Confirm
Click the Add button to finalize the process. The user will now receive an email with a link to access the account with the permissions you’ve assigned.
Managing User Roles and Permissions
Once you’ve added users, you might need to adjust their permissions or remove them as roles change. To do this, go back to the Account Access Management section. Then carry out the appropriate task as listed below depending on your needs:
- Edit Permissions: Let’s say you need to provide more access to someone on your user list because you’d like to take on more responsibility. To do this, click the three vertical dots next to their user name, then click the pencil icon next to their user role to change their role. You can complete the reverse as well in this same spot.
- Remove Users: If someone is no longer working for you, or you need to remove them from your account for some reason, click the three vertical dots next to a user and select Remove Access.
Creating User Groups
If you’re managing a large number of users, creating user groups can streamline the process. User groups allow you to assign roles and permissions to multiple users at once. To create a user group, you’ll need to be part of a Google Marketing Platform organisation.
Steps to Create a User Group
You go about this the same as creating a new user. Instead of selecting Add User, you click Add User Group, like this:
- Go to the Admin section and select Account Access Management.
- Click the blue plus sign (+) and choose Add User Group.
- Enter a name and description for the group.
- Set the permissions for the group, similar to individual users.
- Click Create to finalise the group.
And that’s all there is to it!
Add Users to Google Analytics and Better Manage Your Site
Adding users to Google Analytics is a straightforward process that enhances collaboration and ensures data security. With these steps in mind, you can now hopefully manage user access more efficiently and maintain control over your account.