
Are you ready to secure your WordPress website with an SSL certificate?
If you’re like most website owners, you know that security is a top priority. But without an SSL certificate, your website is at risk of being hacked, losing valuable data, and damaging your reputation.
It’s a pain that you don’t want to experience. But don’t worry; installing a WordPress SSL certificate is easier than you think.
In this article, we’ll walk you through the process step-by-step so you can protect your website and your visitor’s data. Say goodbye to the pain of insecurity and hello to the peace of mind that comes with a secure website!
Before We Begin
Before installing a free SSL certificate on a WordPress site, it is essential to consider why the change is being made.
SSL stands for secure sockets layer. People generally add SSL certificates to their websites because they set the website security protocol by obfuscating data travelling between two parties (the web server and browser).
Sites requiring credit card information or sensitive personal information should be secured with SSL encryption.
The Internet can be a very unsafe place for website owners. If they are experiencing security-related issues, the site’s users are almost always at a higher risk of fraudulent activity.
In most cases, SSL is not even an option these days. Not only do search engines like Google rate pages lower when they are not secured, but most services dealing in commerce must pass rigorous PCI-DSS testing, which requires sites to be completely secure.
Easiest Way to Install an SSL Certificate
Your chosen web hosting provider usually gives you a new SSL certificate for your website. But how you can secure this for your website depends on your chosen web host.
For example, if you have a hosting account on Cloudways, you need to access the “Application” or website installed on your created server.
From here, click on SSL Certificate and choose the Let’s Encrypt SSL certificate, which is available for free.
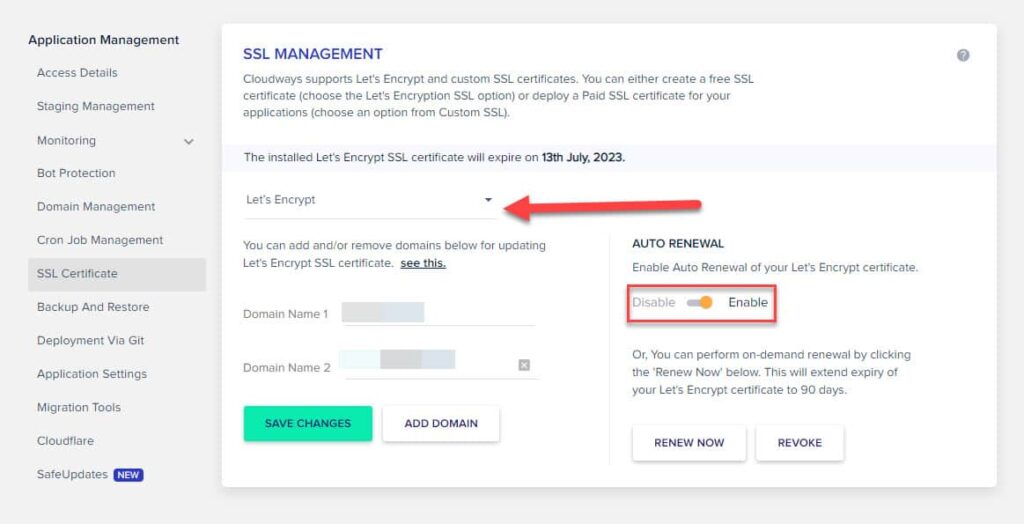
Once you have the SSL certificate installed, automatically renew your certificate so you don’t have to worry about manually updating it on your web host.
Again, how you set up the SSL certificate authority depends on your web hosting and the plan you’ve chosen from them. Some have a dedicated SSL manager that lets you manage certificates for all of your websites.
Premium providers make SSL certification available on all their hosting plans, but it’s best to consult their customer support to verify this info.
So, suppose your hosting plan requires you to set up your SSL certificate in a complicated manner.
In that case, you may consider moving to a web host that provides HTTPS protocol and better security in the simplest way possible.
Shared SSL Using a Plugin
Using a shared solution for SSL certificate installation can be a good option for those managing smaller sites.
The costs of using a shared solution for your SSL needs tend to be low, and almost the whole set-up process is handled by SSL plugins and other built-in tools, making this option extremely popular.
We will cover this process in detail before outlining the basic steps required for installing a private certificate.
What You’ll Need
- A Cloudflare Account
- A WordPress Site
- Cloudflare Plugin for WordPress
- Really Simple SSL (another free plugin)
To get started, create a premium or free Cloudflare account (either works fine). Once the Cloudflare account is created and you are logged in, you can “add a website”.

To add a website, the URL can be pasted into the dialog box.
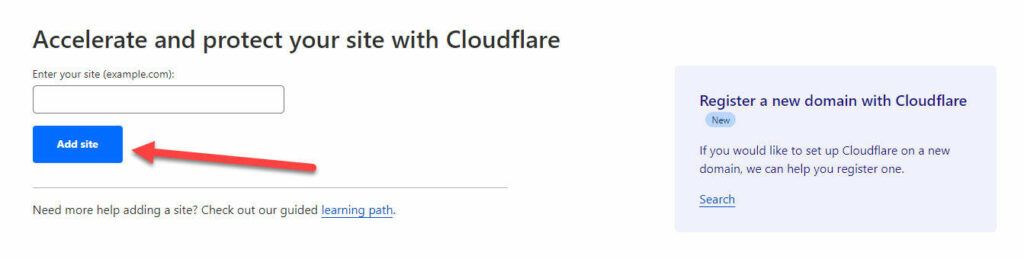
The Cloudflare service will advise you to change your nameservers, and when you agree, steps are clearly described to accomplish this.
Changing your nameservers puts your website’s DNS through Cloudflare and sends all requests over secure CloudFlare networks. Once the confirmation email is sent, you will know all traffic is going through Cloudflare’s secure servers.
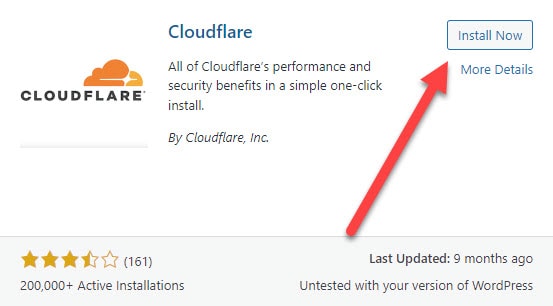
Once the Cloudflare step is finished, it is time to visit the admin page of the WordPress dashboard, where access to the plugins and other site settings can be found.
From the plugins menu, search for and install the Cloudflare plugin. Once installed, the plugin must be activated, as with almost all WordPress plugins.
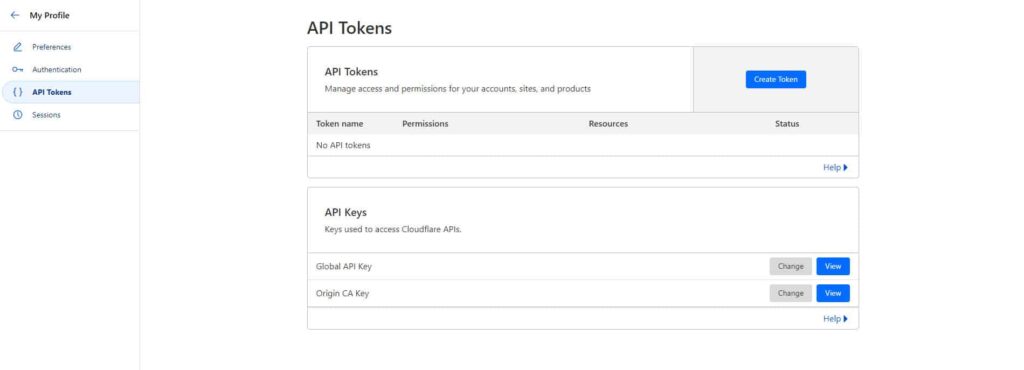
Once active, the plugin will ask for the same email that you used for your Cloudflare account, and when you enter it, you will be given a choice to add an API.

Copy your Global API Key or API Token from your dashboard on the site’s Overview page. Then Click on Get API Tokens.
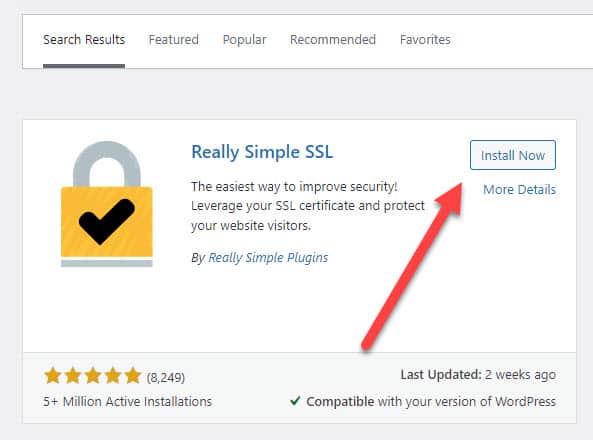
The next step is to install a plugin called “Really Simple SSL”. It should not be activated until later, however.
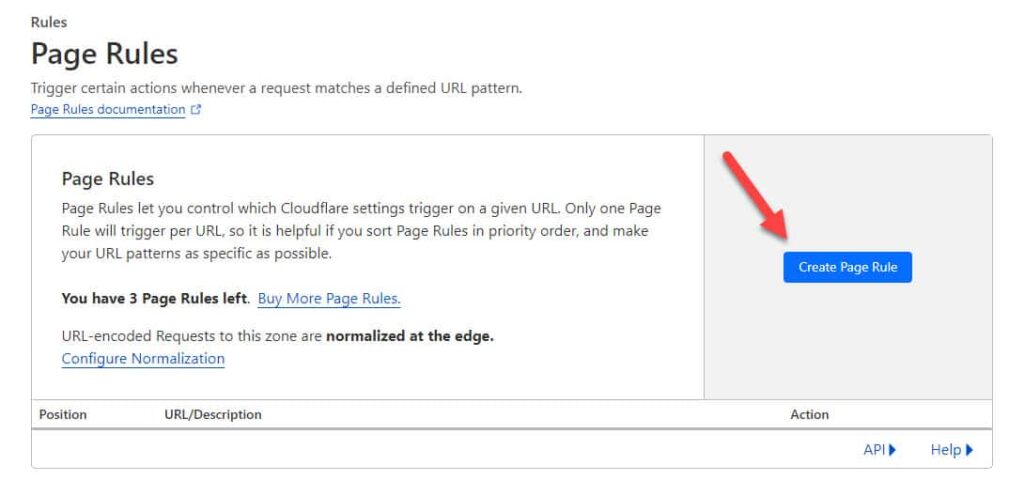
Once the plugin is installed, you must return to Cloudflare, where you will create a new page rule.
After selecting the Cloudflare registered site, an option called “Page Rules” must be chosen.
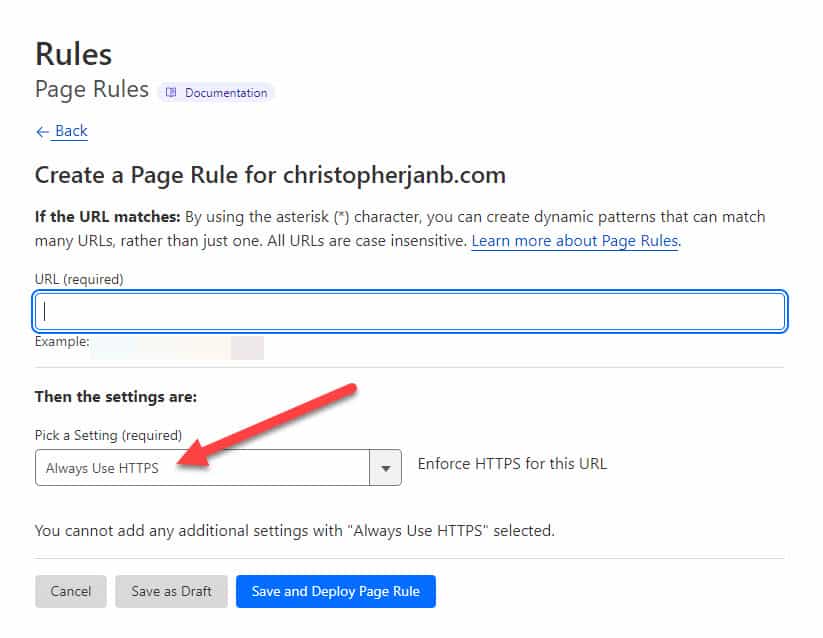
In Page Rules you will need to enter the new rule, http://*yoursite.com/* (“yoursite.com” must be replaced with the name of the site you are working with). The settings for the new page rule should be set to “Always Use HTTPS”, and then the rule should be saved as a draft.
It is time to return to WordPress to activate the Really Simple SSL plugin. You have to open the settings menu for the Cloudflare plugin again to turn on the “Automatic HTTPS Rewrites”. This helps redirect HTTP traffic to the more secure version.
Finally, it would be best to return to the CloudFlare site where you saved your page rule as a draft. The draft now needs to be deployed to finalise the process. Completing this step means that your SSL certificate installation has been completed.
Immediately following this procedure, the site may experience a short period of downtime.
It takes a bit of time for the Cloudflare service to rewrite and re-sign all of the web pages, but once the site comes back up, all you will need to do to see the changes is to sign out and log back in via the new HTTPS address.
Before logging back in, it is also advisable to clear all browser cookies associated with the site and the browser cache. This is where a lot of stored information can be found that may cause issues with getting the desired page to load.
Independent Certificate Installation
There are some benefits to using a private SSL certificate for your site.
The most significant difference is that the certificate is signed only to your domain name when you use the private option. Nobody else uses it, and as a result, it is much easier for browsers to validate.
The types of WordPress sites that would want to use a private SSL are those that do not mind the extra cost of purchasing a dedicated certificate and need the control and versatility that the private option brings.
Online banks, online casinos, shopping websites like Amazon and eBay, and large corporate websites like Home Depot and Sears would all opt for the private option.
Small businesses, blogs, forums, and sites requiring less personal information from visitors can choose the shared version, but to get strict performance, the third-party SSL would be the best choice.
Setting up and deploying a private SSL certificate on a site is not complicated, but the rules differ from host to host for configuration.
Some hosts make it easier for you to go through the process and even help by setting up the private SSL certificate, while others leave the heavy lifting to you.
The process of setting up a private SSL is as follows:
- Create a CSR first, generate a private security key, and then purchase an SSL from a trusted source like CheapSSLShop.com.
- Install the certificate onto the desired server, then redirect all existing URLs from HTTP to HTTPS using your website’s .htaccess file.
- Also, go to the WordPress General Settings page and change the website URL from HTTP to HTTPS.
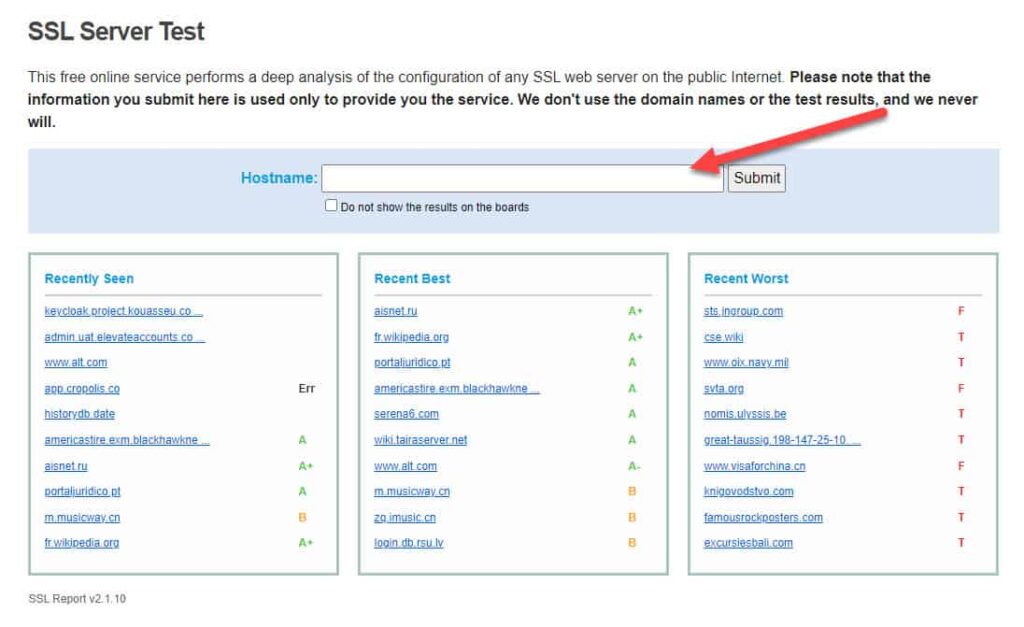
After successfully migrating to HTTPS, the only step needed is to check the SSL certificate for errors.
SSL checker from SSL Labs can work best for this inspection.
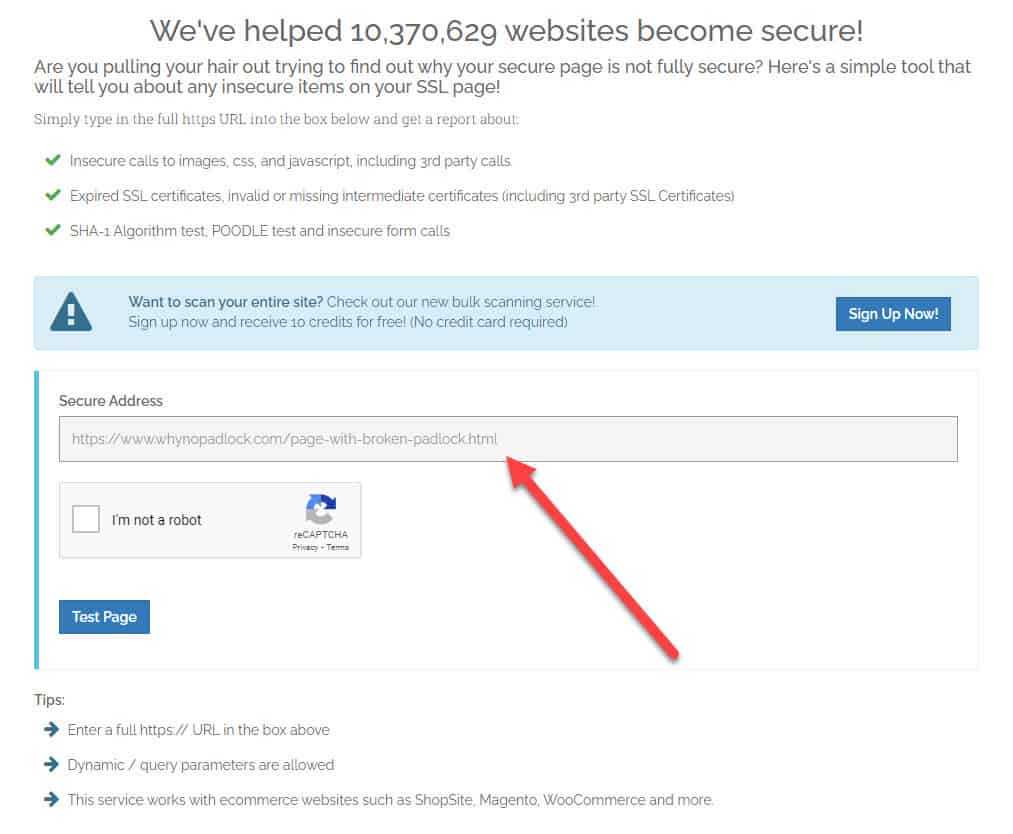
You should also check your website for mixed content warning on Why No Padlock where you will get brief idea if something is going wrong with secure padlock.
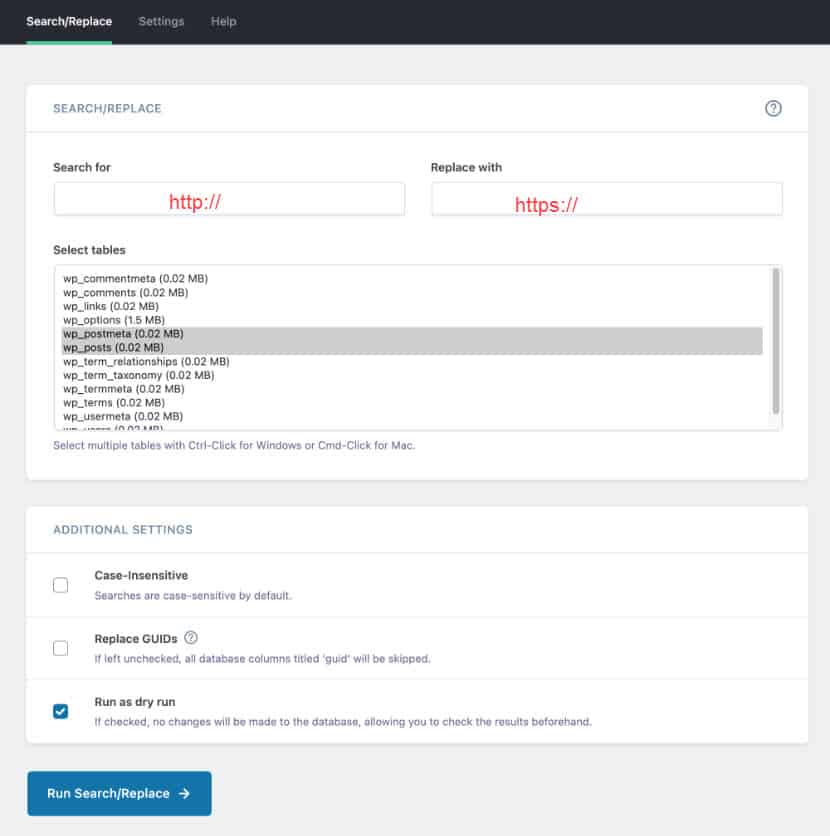
To ensure that your website has no mixed content, you can use Better Search Replace to search for http:// references and replace them with https://.
You can use a text editor like Sublime Text to search and replace http:// instances for https:// within your website’s theme.
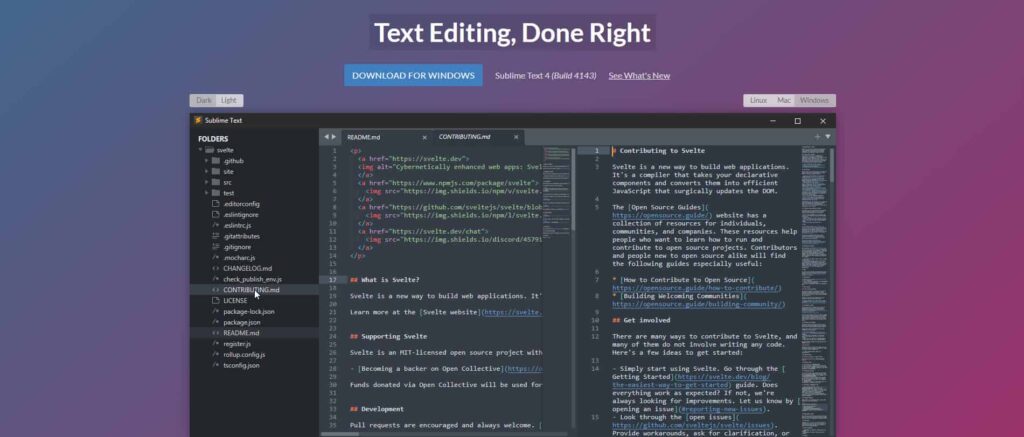
You’ll need to do this locally and upload your changes via FTP. This, alongside the database search and replace should ensure that your website is entirely moved to HTTPS and therefore get the entire green padlock every time.
Conclusion
Adding an SSL certificate to your WordPress website is crucial in ensuring its security and protecting your visitors’ data.
Remember to confirm the domains covered by the SSL, add the SSL and private key and update your site address to include “https.” Additionally, regularly update your SSL certificate and keep your website’s security up-to-date.
By adding an SSL certificate to your WordPress website, you can have peace of mind knowing that your website is secure and your visitors’ data is protected.
100 Tips for Maintaining Your WordPress Site
Defend your site from hackers, improve speed, and learn tactics used by WordPress experts
Thank you for subscribing.
Something went wrong.