
Are you looking for a comprehensive guide to installing WordPress plugins? Look no further! In this article, we will take you through the step-by-step process of how to install and manage plugins on your WordPress website. We’ll cover everything from downloading the plugin files, uploading them to your server, activating them in your dashboard, and troubleshooting any issues that might arise along the way.
We’ll also discuss different methods of finding compatible plugins for various versions of WordPress as well as best practices when it comes to managing a large number of plugins. By the end of this guide, you will have all the knowledge necessary to download, install and manage WordPress plugins with ease!
What is a WordPress Plugin?
A WordPress plugin is a piece of software that adds new features or functionality to your WordPress website. Plugins can be as simple as adding a contact form to your site, or as complex as creating an online store with hundreds of features. There are thousands of free and premium plugins available in the WordPress plugin repository, covering a wide range of functionality.
Choosing the Right Plugin
If you’re looking for a plugin that meets your requirements and is of excellent quality, these few essential tips will help guide you in the right direction to find exactly what you need.

- Get clear on what you need: Before commencing your hunt for the ideal plugin, take a moment to get specific about its intended purpose. Do you require something that allows you to build an opt-in form? Or perhaps one that makes it so you can build an online store? How about getting appointments for your consultation services? Pinpointing your requirements will assist in limiting your search and uncover precisely what works best for you.
- Check the plugin’s ratings and reviews: If you want to measure the quality of a plugin, then look no further than WordPress’s repository. There are ratings and reviews for every single plugin so that it is easier for you in your search. Aim to find plugins with high scores as well as feedback from users who have tried them out already!
- Consider the plugin’s support and documentation: To determine if a plugin is reliable and up-to-date, examine its documentation as well as the support forum. If it’s regularly updated with active maintenance from both developer and community alike, you can be sure that it will remain compatible with WordPress’ current version.
- Evaluate the plugin’s code quality: For those of you who are confident coders, take a peek inside the plugin’s code to get an understanding of its quality. A plugin with clean-cut and organised coding is more likely to be dependable and safe.
Now let’s get down to this installation business.
Note: Before you start installing, there are a few things you’ll need to check:
- To get the most out of your WordPress website, you must have it self-hosted. Unfortunately, plugins are not available for WordPress.com websites.
- Before installing any WordPress plugin, make sure that your website meets its minimum requirements. Usually, these are listed in the plugin description or documentation so be sure to review them carefully. By following this simple step, you can ensure that your installation process runs smoothly and without issues.
- To guarantee a successful download, ensure you have an active internet connection. You will be able to access the plugin from either the WordPress repository or through a third-party website.
- Make sure only to download the plugins you need. You don’t want plugins that conflict with each other or you don’t need them right now, as they may cause problems to your site’s performance.
Method 1: Installing a Plugin from the WordPress Plugin Repository
Installing a plugin from the WordPress Plugin Repository is one of the easiest and most reliable methods for adding new features to your site. In this section, we’ll take you through the step-by-step process of how to find plugins, download them to your computer, upload them to your server and activate them in your dashboard.
Step 1
Log in to your WordPress dashboard.
Step 2
In the left-hand menu, click on Plugins and then Add New.
Step 3
You’ll be taken to the Add Plugins page. Here, you can search for the plugin you want to install by typing in the plugin name or keyword in the search bar.
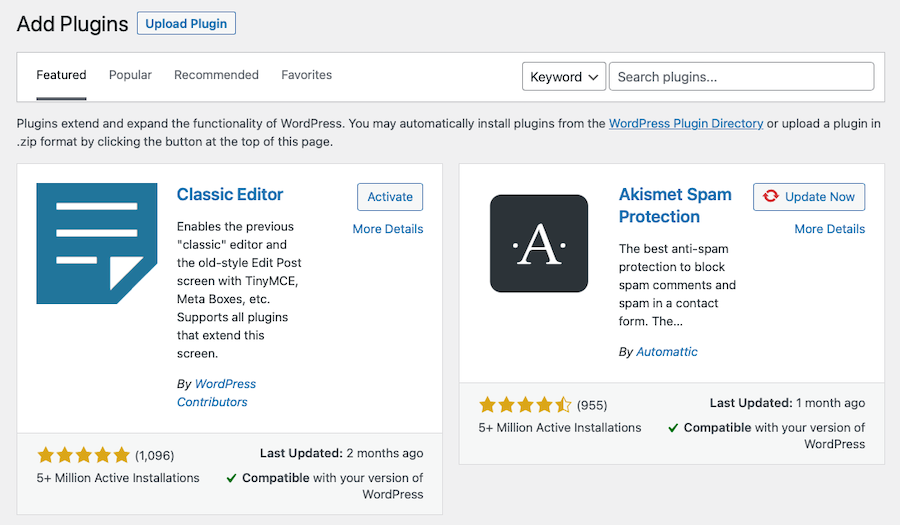
Step 4
Upon selecting the plugin that you desire to install, click the Install Now button to begin installation.
Step 5
WordPress will effortlessly download and install the plugin for you. Afterward, a Successfully Installed message should appear on your screen to confirm that everything went according to plan.
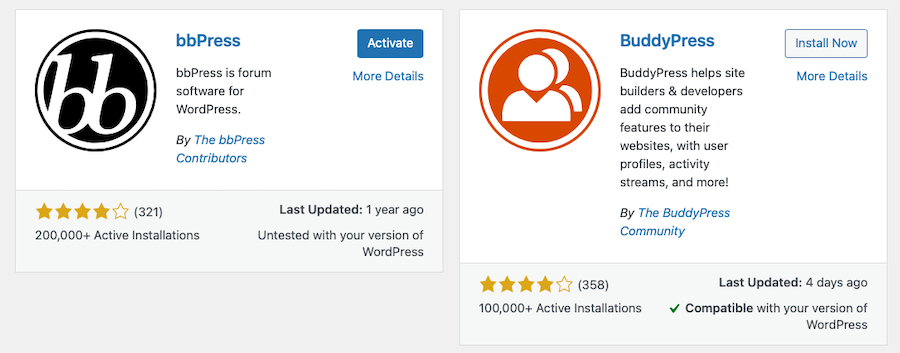
Step 6
To activate the plugin, click on the Activate button.
Method 2: Installing a Plugin from a Zip File
In this section, we’ll discuss the second method for installing WordPress plugins: Installing a plugin from a Zip file.
Step 1
Log in to your WordPress dashboard.
Step 2
In the left-hand menu, click on Plugins and then Add New.
Step 3
On the Add Plugins page, click on the Upload Plugin button.
Step 4
To install your desired plugin, simply click on the Choose File button and select its zip file.
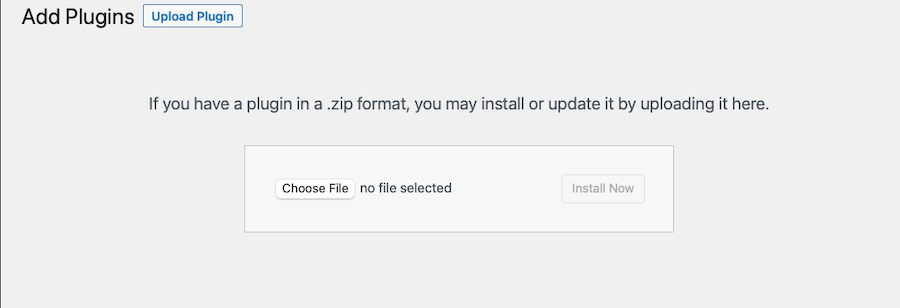
Step 5
Once you’ve selected the file, click on the Install Now button.
Step 6
WordPress will upload and install the plugin for you. Once the installation is complete, you’ll see a Successfully Installed message.
Step 7
To activate the plugin, click on the Activate button.
Method 3: Installing a Plugin Using FTP
Now, let’s dive into a third method for setting up WordPress plugins—installing them using File Transfer Protocol (FTP).
Step 1
Download the plugin zip file to your computer.
Step 2
Unpack the zip file to a directory on your computer.
Step 3
Connect to your website using an FTP client (such as FileZilla).
Step 4
Navigate to the wp-content/plugins folder in your WordPress installation.
Step 5
Upload the plugin folder to the plugins folder on your website.
Step 6
Log in to WordPress, as usual.
Step 7
On the left-hand side of the screen, click on Plugins.
Step 8
Check the list of plugins and you’ll find the one that was just uploaded. To enable its features, click on Activate. It’s as simple as that!
Method 4: Installing a Plugin Using cPanel
The fourth method for installing WordPress plugins is to use cPanel. This method involves uploading the plugin zip file directly from your web hosting control panel and then extracting it on the server. It’s a great option if you don’t have access to an FTP client or aren’t comfortable using one. Let’s discuss how to do it now.
Step 1
Download the plugin zip file to your computer.
Step 2
Extract the zip file to a folder on your computer.
Step 3
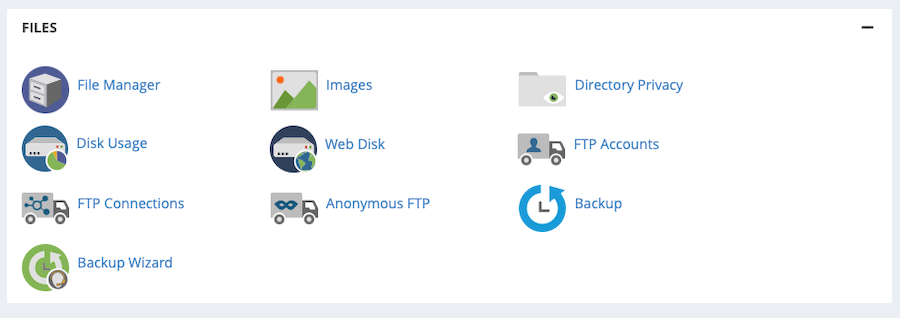
Log in to cPanel and navigate to the Files section.
Step 4
Click on the File Manager icon.
Step 5
In the left-hand menu, navigate to public_html then the wp-content/plugins folder in your WordPress installation.
Step 6
Click on the Upload button in the top menu.
Step 7
Click on the Choose File button and select the plugin folder you extracted earlier.
Step 8
Click on the Open button.
Step 9
The plugin folder will be uploaded to your website.
Step 10
Log in to your WordPress dashboard.
Step 11
In the left-hand menu, click on Plugins.
Step 12
You should see the plugin you just uploaded in the list of available plugins. To activate the plugin, click on the Activate button. And that’s it!
How to Tell if a Plugin is Compatible with Your WordPress Version
When downloading a plugin from the WordPress repository or another source, it’s essential to ensure that it is suitable for your version of WordPress. To guarantee compatibility, simply login to your dashboard and click on Plugins. Each plugin has an information box that showcases its minimum necessary WordPress version as well as other details.
If the plugin does not indicate if it is compatible with your version of WordPress, then that means the developer has yet to test its compatibility. To ensure a smooth-running website and optimum security, we advise you to contact the developer for more information before installing such plugins.
It’s crucial to read the reviews and ratings of any plugin you’re considering, as this is often an excellent hint that it will work with your WordPress version. In case of uncertainty about compatibility, search for a substitute plugin that has been reviewed and confirmed compatible with your specific WordPress version. Doing so can save you from future frustration.
Updating Plugins
Once you’ve installed a plugin, it’s important to keep it up to date to ensure that it continues to function properly and stay secure. Here’s how to update a plugin in WordPress:
Updating a Plugin Automatically
Log in to your WordPress dashboard and navigate over to the left-hand menu, where you will be able to view all of the plugins installed. If any have updates available, you’ll see a prompt reading Update Available. To begin updating a plugin, click on the Update Now button beside it. As soon as this is clicked, WordPress will start downloading and installing – when finished there should be a message verifying that everything has been successfully updated.
Updating a Plugin Manually
You can update plugins manually as well using FTP access:
- Get the newest version of this plugin either directly from the website or through WordPress’ plugin repository – both are free and secure options!
- Extract the zip file to a folder on your computer.
- Establish a connection to your website using an FTP client, like FileZilla or via the File Manager in cPanel.
- Navigate to the wp-content/plugins folder in your WordPress installation.
- Remove the outdated version of the plugin from your website’s plugins folder for an improved experience.
- Upload the updated version of the plugin to your website’s plugins directory for immediate activation.
- Log in to your WordPress dashboard then click Plugins.
- You should see the updated plugin in the list of installed plugins. If the plugin was active before the update, it will remain active.
Again, updating plugins is essential for keeping them functional and prevent security issues. But what if you want to get rid of a plugin you no longer use?
Uninstalling Plugins
If you no longer require the use of a plugin, uninstalling it is an easy task. Follow these steps to remove the desired plugin from your WordPress dashboard:

- Log in and access your WordPress dashboard.
- On the left-hand side menu, select Plugins.
- Look through all installed plugins until you find what needs to be deleted and click on Deactivate next to it.
- If you wish to get rid of the plugin entirely, wait for the deactivation process to complete before clicking Delete as well – this will completely eliminate any traces of that particular plugin from your website.
- You’ll see a prompt that says “Are you sure you want to delete Plugin Name?” and you’ll then need to click OK.
Uninstalling a Plugin Manually
To remove a plugin from your WordPress website, start by connecting to the site using an FTP client like FileZilla. Then, navigate to the wp-content/plugins folder in your installation and delete the corresponding plugin folder that you wish to erase. Lastly, log into your dashboard; if successful, you should no longer see it listed under Plugins on the left side of menu.
Please be aware that uninstalling a plugin will not erase any settings or data it contains. If you want to remove the plugin and its related information from your website, use either a tool designed for this purpose, or manually delete all associated files and configurations.
Troubleshooting Common Plugin Installation Issues
If you encounter any issues while trying to install a WordPress plugin, here are a few things you can try:
- Prior to activating your plugin, be sure to confirm that your WordPress site is meeting the necessary minimum requirements for its installation. If the plugin requires a particular version of WordPress or PHP, double-check if this prerequisite has been met and you are good to go.
- Before you install a new plugin, make sure that your WordPress website has sufficient memory allocated. Certain plugins necessitate an ample amount of memory to run properly; if the allotted capacity is insufficient, then installation may be unsuccessful.
- If the plugin you’re attempting to install is in conflict with an already existing one, simply deactivate the conflicting plugin and reinstall it. This should give you a better chance of successfully installing your desired new plugin.
- Check for plugin compatibility with your theme. Some plugins may not be compatible with certain themes, and this can cause issues during installation.
- Double-check that your WordPress installation has the correct file and folder permissions. If they are inaccurate, installing plugins will be impossible.
These are just a few tips, but they should help you troubleshoot any issues you might encounter while trying to install a plugin. Remember, if all else fails, reach out to the developer for more information.
How Will You Install WordPress Plugins?
Installing WordPress plugins is an essential part of customising and expanding the functionality of your WordPress website. With the various methods outlined in this guide, you should be able to install any plugin you need. And whether you’re using the WordPress plugin repository, uploading a zip file, using FTP, or cPanel, the process is straightforward and easy to follow.
We hope this comprehensive startup guide has helped you learn how to install WordPress plugins. All there’s left to do now is to start installing and customising your WordPress site. Good luck!